Cache Control Custom Addition
Adding Additional 3rd-Party Plugin Support
The MainWP Cache Control Extension itself is designed to give the ability to tap into a class file that actually lives within the MainWP Child Plugin. So in order to add additional support for other 3rd-party Cache Plugins – you simply need to add the correct hooks to the class-mainwp-child-cache-purge.php file & then perform a Pull request on GitHub. Our Development team will go over your code & then perform the merge within a future release.
How to fork a repository, push to GitHub & perform a GitHub Pull Request is out of the scope of this tutorial. You may read how to perform these tasks here:
- About Forks
- Pushing commits to a remote repository
- Pushing changes to GitHub from GitHub Desktop
- Creating a pull request
Steps to Follow
- Fork the MainWP Child Plugin
- Updating the class file
- Push your changes to your fork
- Perform a Pull Request on MainWP Child Master Branch
Information you will need to add 3rd-Party plugin support
- Plugin folder/slug
- Plugin Name
- Plugin Purge Class ( if applicable )
- Plugin Purge Method to call
Make the Code Additions
In the MainWP_Child_Cache_Purge class, locate the check_cache_solution() method and add the new plugin to the array.
'custom-cache-plugin/custom-cache-plugin.php' => 'Custom Cache Plugin',

Next, create a new case in the auto_purge_cache() method switch:
case 'Custom Cache Plugin':
	$information = $this->custom_cache_plugin_purge_action();
break; 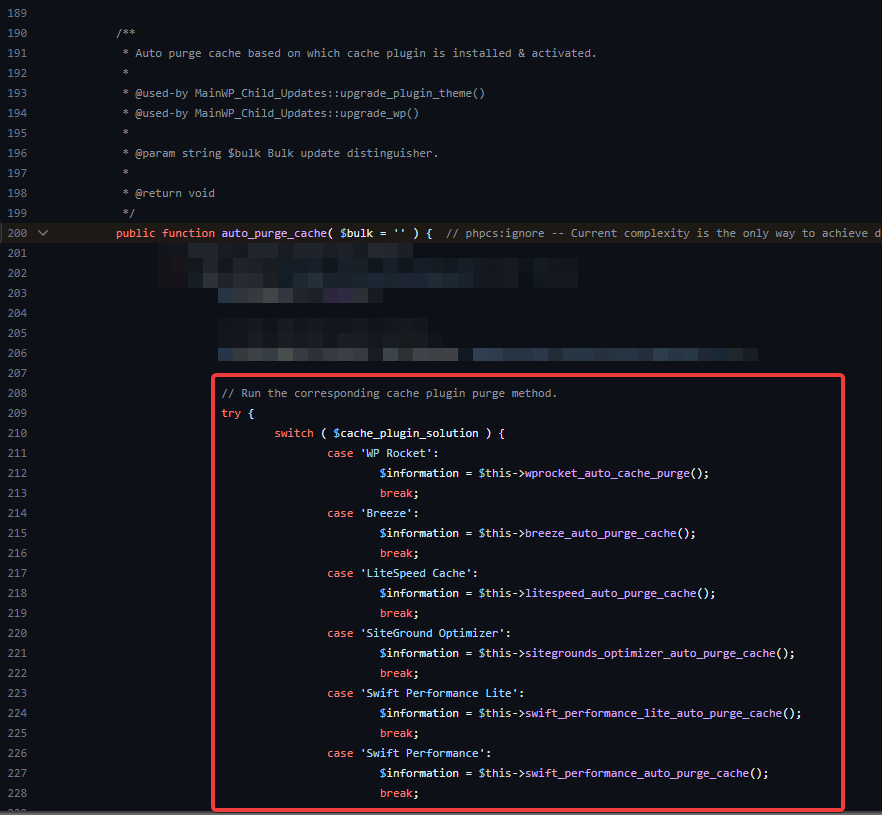
For the end, write the custom_cache_plugin_purge_action() method.
This is our custom method that will finally fire off the custom purge action. Each new addition will be slightly different due to the nature of “custom methods”, however, there are only a few lines within each custom method that need to stay the same in order to function seamlessly with the MainWP Dashboard.
We will need to have our $success_message, $error_message, and $bypass message pre-written for when we return the purge_result() array once our plugin has purged its cache.
You will usually need to check if the plugin class has been initialized in order to call its methods. This method first checks if the public function is loaded & callable – If the public function is not found it will throw the error message – if it is found it will continue on with the operation…
Next, it will grab the saved cache settings & check to see if the built-in auto-purge function is active so that two cache purge routines are not run simultaneously. If the setting is not set it will proceed to fire off the action & then record/return the purge_result() array.
<?php
public function custom_cache_plugin_purge_action() {

    $success_message = 'Custom Cache Plugin => Cache auto cleared on: (' . current_time( 'mysql' ) . ')';
    $error_message   = 'Custom Cache Plugin => There was an issue purging your cache.';
    $bypass_message  = 'Custom Cache Plugin => Purge was bypassed due to the plugin settings.';

    if ( is_callable( 'custom_cache_plugin_method' ) ) {

        // call the plugin method to purge and/or preload cache.

        update_option( 'mainwp_cache_control_last_purged', time() );
        return $this->purge_result( $success_message, 'SUCCESS' );
    } else {
        return $this->purge_result( $error_message, 'ERROR' );
    }
}
Where is the Data?
After everything has been added the newly supported plugin data should be available after a Re-Sync & First Purge. This data is automatically displayed on the Sites Management Page under the “Cache Solution” & “Last Purged Cache” columns as well as on the Extensions > Cache Control > Logs page as shown below.
